Table of Contents
ToggleThe Bomb Tower doesn’t get the spotlight like Mega Knight or Electro Giant, but smart players know it’s one of the most reliable defensive buildings in Clash Royale. Whether you’re climbing ladder in Legendary Arena or fine-tuning a deck for competitive play, this card can shut down entire pushes when used correctly. It’s not flashy, but it does the job, and in 2026, it’s quietly sitting in several top-tier decks.
This guide covers everything from core stats and mechanics to advanced placement techniques, meta positioning, and counter strategies. If you’ve been sleeping on the Bomb Tower or looking to optimize its use, you’re in the right place.
Key Takeaways
- Bomb Tower in Clash Royale is a reliable 4-elixir defensive building that excels against swarm units like Skeleton Army and Goblin Gang, delivering splash damage and death bomb value.
- Air troops represent the Bomb Tower’s critical weakness, requiring deck builders to pair it with complementary air defense cards like Musketeer or Mega Minion for balanced coverage.
- Optimal placement separates skilled Bomb Tower users from average players—center placement works for dual-lane defense, while side placement against Royal Giant prevents outranging penalties.
- The card maintains a solid 8-10% usage rate in 2026 Challenges and thrives in mid-ladder (4000-6000 trophies) despite being a niche pick in top-tier competitive play.
- Graveyard Bomb Tower control decks and Miner Poison variants are the most effective 2026 archetypes, leveraging the building’s defensive strength to enable damage-focused counterplay.
What Is the Bomb Tower in Clash Royale?
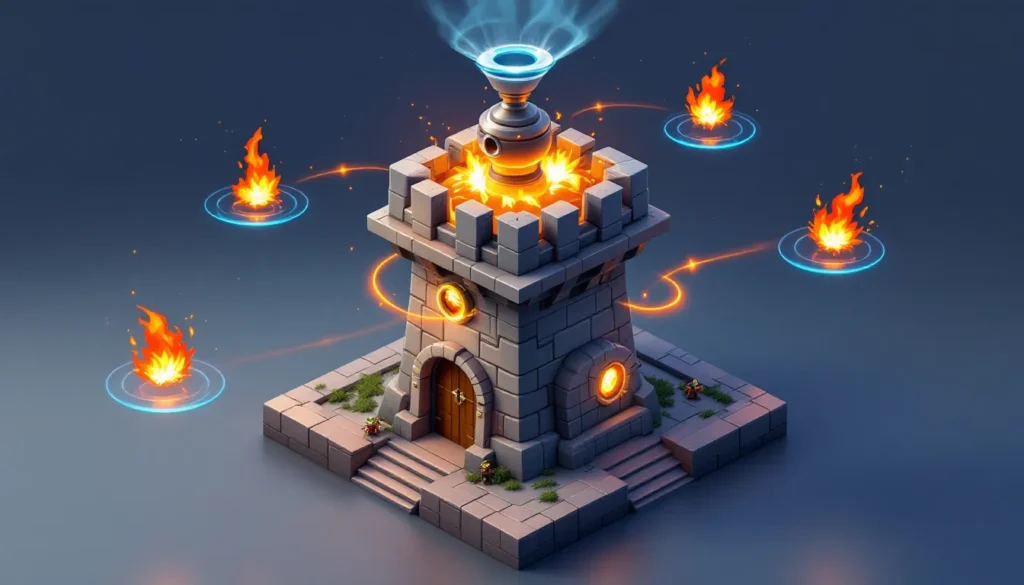
The Bomb Tower is a defensive building card that launches area-damage bombs at ground troops. Unlocked in Arena 6 (Builder’s Workshop), it costs 4 elixir and has a lifetime of 35 seconds. Unlike structures that attack one target at a time, this tower specializes in clearing groups, making it a nightmare for players who rely on swarm units.
Bomb Tower Stats and Elixir Cost
At Tournament Standard (Level 11), the Bomb Tower delivers these stats:
- Hit Points: 1,584
- Damage: 113 (per bomb)
- Death Damage: 271
- Hit Speed: 1.6 seconds
- Range: 6 tiles
- Deploy Time: 1 second
- Targets: Ground only
- Elixir Cost: 4
Maxed at Level 14, the tower hits 131 damage per bomb, with 1,833 HP and 314 death damage. These numbers matter when considering interactions with key cards like Skeleton Army, Goblin Gang, or even mid-health units like Musketeer after a few hits.
The 4-elixir cost sits in a sweet spot, cheap enough to drop reactively, expensive enough that misplacing it hurts. It’s not a cycle card, but it’s not a heavy investment either.
How the Bomb Tower Works: Mechanics and Targeting
The Bomb Tower’s mechanics are straightforward but worth understanding in detail. It lobs bombs that deal splash damage in a small radius, hitting multiple units per shot. The 1.6-second hit speed is faster than many expect, allowing it to chain-clear swarms before they reach your tower.
One crucial mechanic: the death damage. When the building expires or gets destroyed, it drops a final bomb that deals 271 damage at Tournament Standard. This often finishes off weakened units or punishes opponents who ignore the tower’s last gasp.
Targeting is automatic, it locks onto the nearest ground troop within its 6-tile range. Because it can’t hit air, placement becomes critical. Drop it too far forward without air defense backup, and a Baby Dragon will take it out while your opponent pushes the other lane.
Bomb Tower Strengths and Advantages
The Bomb Tower shines in specific scenarios, and understanding when to deploy it can swing matches in your favor.
Excels Against Swarm Units
This is where the Bomb Tower earns its keep. Dropping it against Skeleton Army, Goblin Gang, Barbarians, or Elite Barbarians effectively neuters pushes that rely on overwhelming numbers. Each bomb clears multiple units, and the death damage often wipes stragglers.
Against Graveyard decks, the Bomb Tower is a hard counter. The constant splash damage kills skeletons as they spawn, and even if the Graveyard outlasts the building, the death bomb clears the final wave. Many effective defensive techniques revolve around timing building placements to maximize value, and the Bomb Tower exemplifies this principle.
It also handles Wall Breakers and Royal Hogs effectively. Wall Breakers get one-shot by the death damage if they survive the initial bombs, and Royal Hogs struggle to break through the combined HP pool and splash output.
High Hit Points for Reliable Defense
With 1,584 HP at Level 11, the Bomb Tower absorbs a surprising amount of punishment. It buys time, tanks hits, and forces opponents to commit additional elixir to clear it. This HP advantage makes it more durable than Cannon (864 HP) or Tesla (1,104 HP), though those cards have different use cases.
The durability matters most in sustained defenses. When facing a Royal Giant or Giant push supported by swarms, the Bomb Tower can handle the support troops while your tower or additional defensive units deal with the tank. Players who’ve mastered core defensive strategies know that buildings with high HP create breathing room for counterplay.
Death Damage for Extra Value
The 271 death damage is not negligible. It’s enough to finish off wounded troops like Musketeer (down to 327 HP after a few hits), Dark Prince (often weakened after charging through your defense), or clumped-up swarms.
This death damage also punishes opponents who send troops directly into the tower’s footprint. A Hog Rider that reaches the tower takes the death bomb directly, losing a chunk of HP before connecting with your Princess Tower. The same applies to Battle Ram, if it transforms near the Bomb Tower, the death damage can take out the Barbarians before they swing.
Bomb Tower Weaknesses and Limitations
No card is perfect, and the Bomb Tower has exploitable gaps.
Vulnerability to Air Troops
The biggest weakness: it cannot target air units. Dropping a Bomb Tower against a Lava Hound, Balloon, or Baby Dragon push does nothing. Your opponent gets free damage, and you’ve wasted 4 elixir.
This limitation forces deck-building choices. If you run Bomb Tower, you need reliable air defense, Musketeer, Mega Minion, Hunter, or Electro Wizard are common picks. Without air coverage, you’re handing air-heavy decks an easy win.
Players tracking the current meta compositions often note that Bomb Tower usage rises and falls based on how many air decks are in rotation. In metas dominated by LavaLoon or Balloon cycle, the Bomb Tower sees less play.
Struggles Against Single-Target Tank Units
The Bomb Tower is built for swarms, not for solo tanks. Against a lone P.E.K.K.A., Mega Knight, or Giant Skeleton, it doesn’t provide enough DPS to stop the push. The tower will land some damage, but the tank will outlive it and continue marching toward your tower.
This is where support becomes essential. The Bomb Tower can delay and chip at tanks, but you’ll need additional firepower, Mini P.E.K.K.A., Knight, or Valkyrie, to finish the job. According to analysis from mobile strategy sources, buildings like Bomb Tower work best when paired with high-DPS troops that can capitalize on the distraction.
Against Royal Giant, the Bomb Tower placement matters. If you drop it in the center, the Royal Giant’s 6.5-tile range lets it outrange the tower and target your Princess Tower instead. You’ll need to place it reactively, closer to your tower, so the Royal Giant retargets to the building.
Best Bomb Tower Deck Strategies in 2026
The Bomb Tower fits into several archetypes, but it thrives in control and hybrid decks that lean on defense-to-offense transitions.
Graveyard Bomb Tower Control Deck
This is one of the most popular Bomb Tower decks in 2026. The core concept: use the Bomb Tower to shut down ground pushes, then punish with Graveyard when your opponent overcommits.
Sample Decklist:
- Graveyard
- Bomb Tower
- Knight
- Arrows or Barb Barrel
- Poison
- Ice Wizard
- Electro Wizard or Musketeer
- Skeletons or Ice Spirit
This deck excels at controlling the pace. The Bomb Tower handles swarms, Knight tanks for Graveyard, and Poison clears counters like Minion Horde or Archers. Ice Wizard slows pushes, buying the Bomb Tower more time to cycle bombs.
The win condition is simple: defend efficiently, build an elixir advantage, then drop Graveyard on a weakened tower. Many winning deck builds follow this control-to-punish template, and Bomb Tower fits perfectly.
Miner Poison Bomb Tower Cycle
This archetype leans on chip damage and defensive consistency. Miner provides the primary tower pressure, while Poison controls the board and racks up damage over time.
Sample Decklist:
- Miner
- Poison
- Bomb Tower
- Knight or Valkyrie
- Electro Wizard
- Bats or Minions
- Skeletons
- The Log or Zap
The Bomb Tower anchors the defense, handling ground swarms and forcing opponents to use air or spell-heavy counters. Miner Poison works by chipping 500-700 damage per push, then cycling back to repeat. Over three minutes, that adds up.
This deck thrives in longer matches. Patience is key, don’t overcommit on offense. Let the Bomb Tower and Knight do the heavy defensive lifting, then send Miner + Poison to pressure towers and control troop deployments.
Royal Giant Bomb Tower Beatdown
For players who prefer a more aggressive style, pairing Royal Giant with Bomb Tower creates a balanced beatdown deck. The Bomb Tower defends, and Royal Giant applies constant pressure.
Sample Decklist:
- Royal Giant
- Bomb Tower
- Fisherman
- Hunter
- Electro Wizard
- Fireball
- The Log
- Skeletons
This deck uses the Bomb Tower to stabilize defense, then deploys Royal Giant at the bridge or behind the King Tower during double elixir. Hunter provides high DPS against tanks, Fisherman pulls threats into Bomb Tower range, and Fireball clears support troops.
Royal Giant’s 6.5-tile range lets it snipe towers from a safe distance, and when paired with Fisherman, it can drag defenders into awkward positions. Data from meta analysis sites shows this deck performs well in mid-ladder and Challenge modes, especially against ground-heavy opponents.
How to Counter the Bomb Tower
Facing a Bomb Tower? Here’s how to dismantle it.
Using Air Units Effectively
The simplest counter: go airborne. Cards like Minions, Mega Minion, Baby Dragon, or Inferno Dragon ignore the Bomb Tower entirely and deal damage to the opponent’s tower or clear supporting troops.
Balloon is particularly effective. If the opponent drops Bomb Tower in response to your push, the Balloon will fly past it and connect with the tower. Pairing Balloon with Lava Hound forces the opponent to choose: deal with the Hound or stop the Balloon. Either way, the Bomb Tower is useless.
Even cheaper options like Bats can chip away at the Bomb Tower if the opponent lacks spell answers. A well-timed Minion Horde can also overwhelm defenses, though it’s vulnerable to Arrows or Fireball.
Tank and Spank Strategy
If you’re running a beatdown deck, the “tank and spank” approach works well. Deploy a high-HP tank like Giant, Golem, or Lava Hound in front, then stack high-DPS troops behind.
The Bomb Tower will target the tank, but it doesn’t deal enough DPS to stop a full push. Meanwhile, your support troops, Musketeer, Wizard, or Electro Dragon, clear any additional defenders. The tank absorbs the Bomb Tower’s hits and death damage, while your backline dismantles the tower and pushes toward the Princess Tower.
This strategy requires elixir investment, so timing matters. Push during double elixir or after a successful defense when you have an elixir advantage.
Spell Cycling and Chip Damage
In some matchups, especially control vs. control, spell cycling becomes viable. Cards like Fireball, Rocket, or Earthquake can damage the Bomb Tower while also hitting the opponent’s tower.
Earthquake is particularly effective. It deals extra damage to buildings, knocking down the Bomb Tower in two casts while chipping the tower. Combined with Miner or Hog Rider, this creates a steady stream of damage that bypasses the Bomb Tower’s defensive value.
Lightning can also work if the opponent clusters troops near the Bomb Tower. One Lightning cast can take out the building and any supporting units, though the 6-elixir cost is steep.
Bomb Tower Upgrade Priority and Progression Tips
Upgrading the Bomb Tower impacts specific interactions, so knowing when to prioritize it matters.
When to Upgrade Bomb Tower
If you’re running a Bomb Tower deck consistently, aim to keep it within one level of your other cards. Underleveled Bomb Towers lose key interactions, specifically against Goblin Gang, Skeleton Army, and Wall Breakers.
At Level 11, the Bomb Tower one-shots Level 11 Goblins (216 HP) with its 113 damage. Drop to Level 10, and it deals 103 damage, not enough to one-shot Level 11 Goblins. That extra hit gives the swarm more time to deal damage, which can swing close matches.
Death damage scaling is also critical. At Level 14, the 314 death damage takes out Level 13 Archers (304 HP) and Level 13 Princess (304 HP). Underleveling the Bomb Tower means these units survive, reducing your defensive value.
Card Level Impact on Interactions
Key interactions to watch:
- Level 11 Bomb Tower one-shots Level 11 Goblins, Spear Goblins, and Skeletons.
- Level 12 Bomb Tower one-shots Level 12 Goblins and survives one extra hit from Level 12 Hog Rider.
- Level 14 Bomb Tower death damage kills Level 13 Archers, Princess, and Dart Goblin.
If you’re climbing ladder and facing overleveled cards, prioritize upgrading the Bomb Tower to maintain these breakpoints. In Challenges and Tournaments, all cards are capped at Level 11, so this matters less, but on ladder, card levels dictate outcomes.
Advanced Bomb Tower Placement and Timing
Proper placement separates average Bomb Tower users from players who squeeze maximum value from every drop.
Optimal Placement Positions for Defense
The center plant is the default. Dropping the Bomb Tower four tiles in front of your King Tower and centered between both Princess Towers pulls troops from either lane. This placement maximizes defensive coverage and forces opponents to commit more elixir to break through.
Against Hog Rider, center placement pulls the Hog into the kill zone, allowing both Princess Towers to target it while the Bomb Tower lands hits. The death damage often finishes the Hog or leaves it with minimal HP.
For Royal Giant, place the Bomb Tower closer to your Princess Tower on the side the RG is targeting. If you center-plant, the Royal Giant’s 6.5-tile range lets it outrange the tower. Placing it closer forces the RG to retarget, wasting its shots on the building instead of your tower.
Against split-lane pushes (like dual-lane Goblin Gang or Skeleton Barrel), a center Bomb Tower can handle both lanes simultaneously. The splash radius is small, but positioning it correctly lets you clear troops on both sides before they connect.
Preemptive vs. Reactive Placement
Reactive placement is standard, wait until your opponent commits troops, then drop the Bomb Tower. This conserves elixir and ensures you’re responding to actual threats rather than guessing.
Preemptive placement works in specific scenarios. If you know your opponent runs Graveyard and they’ve cycled to it, dropping the Bomb Tower early can deter the push entirely. Similarly, if you’re up in elixir late in the match, placing the Bomb Tower preemptively forces your opponent to deal with it or concede defensive value.
Timing also matters in double elixir. Dropping the Bomb Tower behind your King Tower at the start of double elixir lets it walk forward, providing mobile defense that adapts to your opponent’s push. This is riskier but can create strong defensive setups when paired with troops like Knight or Valkyrie.
Bomb Tower Meta Analysis: Where It Stands in 2026
As of early 2026, the Bomb Tower occupies a mid-tier defensive slot in the meta. It’s not dominating Grand Challenges or topping leaderboards, but it’s a solid, reliable choice for players who face ground-heavy decks.
The current meta leans toward cycle decks and air-heavy archetypes, which limits Bomb Tower’s effectiveness. Decks running Lava Hound, Balloon, or Flying Machine pressure builds struggle against Bomb Tower, but those decks are prevalent enough that players hesitate to commit deck slots to it.
But, in mid-ladder (4000-6000 trophies), the Bomb Tower thrives. Players at this range often favor ground swarms, Elite Barbarians, Mega Knight spam, Royal Hogs, and lack the refined air-focused strategies seen in top-tier play. Here, the Bomb Tower is a consistent performer.
Recent balance changes (as of March 2026) haven’t touched the Bomb Tower directly, but indirect shifts have impacted its viability. The nerf to Goblin Barrel (reduced Goblin HP) made swarm-clearing buildings slightly less valuable, while the buff to Baby Dragon (increased splash radius) made air decks stronger, both trends that work against the Bomb Tower.
Still, according to data from competitive guides, Bomb Tower maintains a respectable 8-10% usage rate in Challenges and a higher rate on ladder. It’s not the flashiest card, but for players who prefer defensive stability over high-risk plays, it’s a worthy inclusion.
Expect the Bomb Tower to remain a niche pick rather than a meta staple. Its strengths are too specific, and its weaknesses too exploitable, for it to break into top-tier competitive play. But for the right deck and the right player, it’s a powerhouse.
Conclusion
The Bomb Tower isn’t going to win you highlight-reel plays, but it will win you matches, quietly, consistently, and without fanfare. It excels at shutting down swarm pushes, absorbing damage, and delivering value through its death bomb. When paired with the right deck and placed correctly, it becomes an anchor that opponents struggle to break through.
Understand its limitations, air vulnerability and weak single-target DPS, and build around them. Pair it with air defense, high-DPS troops, and smart elixir management. Whether you’re running Graveyard control, Miner cycle, or Royal Giant beatdown, the Bomb Tower can be the defensive foundation that keeps your towers standing.
In 2026, it’s not the trendiest card, but it’s one of the most dependable. And in a game where one defensive stop can turn into a game-winning counterpush, dependability is everything.